Homemade Power Granola

7 May

müsli1

Can diabetics eat muesli? I thought not but now I think so.

What seems like a long time ago, I thought eating cereal and muesli for breakfast was bad for my blood sugar. I used to eat cornflakes (I love cornflakes) and store-bought muesli and my blood sugar would always shoot up terribly high despite me increasing my insulin dosage. I knew that there was sugar in these products but I always thought the spikes were also due to the large amount of carbohydrates in all those grains. If you’ve ever looked at the nutritional values of rolled grains like oats, spelt and co., you’ll see that the carbohydrate content is over 65 g per 100 gr. And when you are low carbing and trying to control high glucose readings, you know what you are supposed to do – stay the hell away from those carbs.

I happened to have one of those high readings on my records when I visited my endocrinologist for a checkup and explained that I had eaten muesli. He found it odd and said whole grains have a low glycemic index so they should be ok. I dismissed this comment but when I came across a granola recipe which didn’t have much more than honey as a sweetener, I decided to make my own granola to test it out. Of course, I could have just mixed a bowl of unsweetened muesli flakes together but that has never appealed to me and hence, I never tried it. On the other hand, granola is so delicious, I could eat it all day.

Now for breakfast, I often eat 4 heaped tablespoons of my homemade granola with 4 tablespoons soy yoghurt. I only need half the insulin dosage I previously needed. My blood sugar does go up initially but it comes down much faster than if I ate store-bought muesli or cornflakes. Hurrah!

If I want to snack, which is usually the case, I just pick at two tablespoons of granola. Be careful though – you need to measure out the granola into a bowl and not eat straight from the container cos before you know it, you would have eaten way more than you should. And you have to PICK at it with your fingers and not use a spoon! You want to prolong the pleasure. This granola is sooooo addictive and delicious.

There are lots of recipes on the Internet with different combinations of ingredients. As long as you have the right proportion of muesli and sweetener, you really can’t go wrong. Well, yes, you can actually go wrong. You could bake the granola too long and get burnt granola but by the time you make the next batch, you would have learnt from your mistake.

So let’s get to it. In the recipe below, I use only good quality organic honey and maple syrup.  This recipe makes enough to fill one 1 liter container.
 
müsli2


Homemade Power Granola
 
100 gr large flake rolled oats

100 gr large flake rolled spelt

50 gr oatmeal or steel cut oats

50 gr small spelt flakes (like the oatmeal size)

15 gr wheat bran, oat bran or spelt bran

100 gr slivered almonds

20 gr sunflower seeds

20 gr flaxseeds

30 gr shredded coconut or larger pieces (optional)

60 gr quinoa – rinsed in hot water and drained (optional)


Sweetening ingredients

4 Tbsp honey + 1 Tbsp maple syrup + 1 Tbsp agave syrup OR

5 Tbsp honey + 1 Tbsp maple syrup or agave syrup

1 tsp salt

2 Tbsp vegetable oil


To be added later. These are also optional.

20 gr pumpkin seeds – add during last 10 min of baking

100 gr dried cranberries or dried cherries – add when granola is cooled

40 gr puffed spelt, puffed oats or puffed amaranth – add when granola is cooled


Note: the quantities given are suggestions. A few grams more or a few grams less won’t make any difference. However the ratio of the sweetening to the dry ingredients should be roughly adhered to.

Preheat oven to 150 degrees C.

Mix all the ingredients together, except those indicated under ‘To be added later’. Make sure the sticky honey and syrup are evenly distributed throughout the mixture. Pour mixture onto a baking sheet lined with parchment paper (don’t stinge on your parchment, cover the baking sheet fully) and spread out evenly.

Bake for 30 min. Every 10 min, take the tray out of the oven and stir the granola. After 20 min, add the pumpkin seeds and bake for the last 10 min. I find the pumpkin seeds tend to look burnt if added at the beginning. If you like them very roasted, add them at the beginning.

Cool your yummy granola thoroughly and mix in the other ingredients before packing it into an airtight container.

Other things you could add: dark chocolate flakes, goji berries, sprinkle with baobab powder, wheat grass or spirulina, chia seeds etc, etc. Use your imagination!


Yumm … off to snack now.


Summary: April 2014 to Feb 2015

6 Mar

Yes, it’s been a long, long time since I’ve written a post. In fact, I saw the last time I posted something was June 2014!

Today, I’m on top of the world so I said to myself, I must sit down and write something, just for the sake of recording my progress. I read what I wrote on my home page and yes, I have definitely made progress.

First of all, my excuses for the long absence. In May last year, I contracted a really bad bout of gastroenteritis and was down and out literally, for 5 weeks! At the end of the 5 weeks, no doctor was able to tell me what I had! Anyway, all the diarrhea and vomiting resulted in some weight loss so I was really happy. The bad part is, anyone will tell you that if you lose weight that way, you will put it all back again, and more, when you start to eat.

I did. We had visitors come after I got well and so I ate with them. My parents in Singapore got sick and I was down there for a very long time. Everyone wanted to meet up and have a meal – that’s the national pastime in Singapore! So I ate and ate. After all the stress, when I came back, Christmas was approaching and since my diet was so messed up anyway, I reverted back to eating all kinds of crap! Horror of horrors. Needless to say, you can guess which way the scale numbers went. One step forward, two steps back.

New year, new resolutions as always. In January 2015, I got fed-up with how I looked. My blood glucose levels were ok but that was because I took more insulin to control it. Furthermore, none of the aches and pains I had been complaining about for years had gotten any better.

The book which led me to start this blog, Dr Bernstein’s Diabetes Solution, wasn’t my solution to diabetes and did not seem to bring about the results I wanted. It wasn’t so easy for me to put what Dr Bernstein preached into practice. I did end up reducing my daily insulin intake but my Hb1AC wasn’t budging as much as I wanted it to budge.  I low carbed  but making all those low carb replacements (some were down right unappetizing) was just taking up a lot of time.  It takes even more time to cook when the other members of the family aren’t low carbing and you have to prepare another meal for them! I guess I should have just stuck to vegetables. As time went on, I got lazier and lazier at packing out my kitchen equipment to make my noodles, cakes, etc, etc. And all the cleaning afterwards…

Bringing my Hb1AC down to under 6.0 (my goal) seemed to be distant. I did bring it down once to 6.1 but it went up to 6.5 again.

Find a new strategy for 2015? The lucky stars seemed to have been upon me. While in Singapore, I learnt of how Chinese acupressure had helped my mum during her illness. One thing led to another and I decided to find out more about building up my qi, releasing energy blockages and how to cook the TCM (Traditional Chinese Medicine) way in order to eat more healthily. On Amazon, I found two books – one containing recipes and Qi Gong called The Dragon’s Way* by Nan Lu (Website) and another called Energy Medicine* by Donna Eden (Website). The Dragon’s Way is actually a diet book but I bought it because of what people said about the Qi Gong exercises and the author’s explanation of the Five Elements. I bought the book on Energy Medicine hoping to help rid my body of a lot of persistent problems.

Armed with these books, I started to incorporate some of the recommended exercises into a daily morning routine – which ended up taking a whole hour of my time each morning. I am a skeptic but nevertheless, I did them diligently and saw some startling changes. I started having hypos and needed to reduce my insulin dosage. I also started to lose some weight but that was mainly because I went vegan.

Then I was introduced to another fantastic book called Healing with Whole Foods* by Paul Pitchford. This turned out to be a real treasure. Pitchford explains western nutrition through the TCM perspective and how these affect your body. An amazing and very educational read. Check it out. I still haven’t finished reading the book yet.

Since Jan 7, I have been doing Qi Gong daily. I also go to Zumba classes twice a week and have cut out meat and dairy by 90%. You could say I’m on a vegan diet but I do sin by taking things like cakes, biscuits and chocolates which do contain butter, refined sugar and milk, when hungry. Of course, all in smaller quantities than I previously took and I look for the ‘healthier variety’. I also drink 1-2 cups of espresso a day. Basically, I try to be as good as I can but I am, by no means, very strict. Other than that, I just try to eat veggies and tofu (I’ll talk about tofu further down) in different ways, some whole grain and take a fruit and vegetable juice with bee pollen almost daily. When possible, I also go out for a walk of between 45min – 1 hr.

To cut a long story short, something good has come out of all this. I went to my endocrinologist yesterday and my Hb1AC has dropped to 5.8! I got such a shock – a good shock of course! 🙂 Whether 5.8 is a diabetic value or not depends on who you ask. Dr Bernstein says most non-diabetics have Hb1ACs of 4.2-4.8. My endocrinologist says diabetics can’t expect to attain such values without compromising on something else. He would consider anything above 5.5 the beginning of being diabetic but he would be very happy with 6.4. The lab reports I’ve done indicated that anything below 6.1/6.2 is in the normal range. Whatever it is, I am happy to have cracked the 6.0 mark!

If I can make this value lower, I’ll be sure to report it here but for now, I am going to continue with what I’ve been doing and make sure I maintain an under 6.0 reading. I don’t feel that it’s as much of a strain as when I was making all those carb replacements or too much work.

This is definitely a reason to celebrate (sensibly)! Have a good weekend!

………

Note about Tofu: I’ve been warned about taking too much soy products and there are many articles being circulated about the dangers of consuming soy. If you’ve read them, the articles claim taking large amounts of soy can lead to breast cancer, thyroid problems, kidney problems, impotence, frigidity, Alzheimer’s – the list goes on. Yes, it’s probably true – the key word is large amounts.

In an effort to come up with alternatives to meat, the American food industry has developed all kinds of soy products mostly made from genetically modified soy crops. I think overdoing any product will be harmful to your body, especially eating stuff which is unnatural. Everything should be consumed in moderation.

If one sticks to tofu, fermented tofu products and soy milk without additives (read the labels. Best is homemade), then soy products have many positive, healthful attributes. The Chinese have eaten tofu for centuries. They should all be suffering from terrible diseases by now. In TCM, soy is cooling and if you take too much, your body will end up being in a state of imbalance causing all kinds of problems. Use food wisely and it won’t harm you.

………

* My thoughts on the above mentioned books

TCM: A Natural Guide to Weight Loss that Lasts – The Dragon’s Way, Wu Ming Meridian Therapy – I found the book easy to read. However, TCM was not covered to the level I was looking for. It was a good starting point for me and gives the beginner a good, albeit shallow insight into TCM. The qi gong exercises were badly described so I wasn’t (and still am) not sure if I am doing them right. More photos could have been included. I didn’t try any of the recipes in the book. I also did not lose ’12 pounds and 8 inches in 6 weeks’ as the book claims one would most likely lose. I did however, gain other benefits like becoming more alert, calmer and enjoyed reading about the Five Elements. The book provided the springboard to the other two books which follow.

Energy Medicine – This book clearly explains what qi energy is all about and how one can remove blockages in the body. I tried some of the techniques and was very surprised that some do work. The gains from doing the others have yet to be noticed.  I haven’t read the book cover to cover yet. Only picked out the stuff I was interested in and am doing the exercises. This and any of Donna Eden’s other books are worth buying.

Healing with Whole Foods – as mentioned above, this is a very comprehensive book which will help you understand the foods you eat and how they affect you. Definitely worth buying.

Stuffed Zucchinis

14 Jun

I like stuffed bell peppers but somehow, very rarely do stuffed zucchinis.

At the supermarket last week, I saw some fat zucchinis and thought, this might be the opportunity to make stuffed zucchinis instead of stuffed bell peppers. Found a great Turkish stuffed zucchini recipe but alas, I needed some special turkish cheese and I wasn’t about to make a trip down to town just to get the cheese. So I settled on ground beef. Zucchinis stuffed with ground beef has probably been done a zillion times but I decided I would do this out of my head. Turned out good and simple and hubby has requested that this be made more often. 🙂

Stuffed Zucchinis

Stuffed Zucchinis

So if I’m going to make it again, I’d better write the recipe down somewhere … like here.


Stuffed Zucchinis with Beef

Serves 2

2 big fat zucchinis. Try to get ones that a uniformly wide.

300 gr minced beef

1 small onion, finely chopped

1 Tbsp olive oil

½ can chopped tomatoes

½ tsp mediterranean herbs eg. oregano, thyme or basil

salt, pepper

grated cheese e.g. parmesan, pecorino, gouda, mozzarella


Wash the zucchinis, put in a saucepan, cover with water and boil for 10 min. The zucchinis should be just tender. They will get softer when they are baked later on.

Drain the water and leave the zucchinis to cool.

In another saucepan, heat the olive oil and glaze the onions. Add the mince and brown all over. Season with salt and pepper and then add the chopped tomatoes. Add only enough tomatoes so that the meat is covered but not too liquid. You want the filling more dry than watery. Stir in about 1/2 tsp of your choice of dried herbs (1 Tbsp if fresh, chopped), cover the pan and let simmer on low for about 20 min., checking occasionally to see that the filling is not too dry. If so, add a bit more tomato sauce. At the end of the cooking time, adjust the seasoning and let the mixture cool a little.

Preheat your oven to 200 degrees C.

Now back to the zucchinis … Slice them lengthwise in half and if you like, trim the ends, otherwise this will be done by the diner. Using a small teaspoon, scoop out the inside flesh making sure the edges are not too thin. You don’t want the shell too thin and fragile. To make it easier to scoop out the flesh, score the inside of the zucchini with a knife, being careful not to rip the sides. Place the shells in an oven-proof dish. The zucchinis will give off liquid during baking. Sprinkle the shells with salt and pepper.

Zucchini shells

Zucchini shells

Fill the shells with the meat sauce. Sprinkle with grated cheese and bake for about 20 min or till the cheese is nice and brown.

Serve with a side salad and you have a nice, light lunch, low in carbs.

Enjoy!

Print this recipe – Stuffed Zucchinis with Beef

Summary: Jan – Mar 2014 plus Very Berry Sauce

19 Mar

Spring is here – yay!

Tulips

The sun and warm temperatures have lifted my spirits after the disappointing Hb1 AC value for the first quarter 2014. My experiment of eating a mix of low carb and non-low carb meals didn’t really keep my Hb1AC values level. I am not sure if Carnival in Munich was the culprit but I’ll blame it on that. Carnival here, like in many other parts of the world, is the time when the whole city not only becomes crazy but also the time when it’s inhabitants become doughnut crazy. Doughnuts are baked in all possible variations. These are not only sold everywhere but kind colleagues will bring boxes into the office for everyone. It’s really hard to go anywhere in Munich without seeing doughnuts screaming “eat me! eat me! “. Oh well…

The only person who was pleased with my increased Hb1AC was my doctor who said fluctuations are to be expected and he does not see a problem!

Figure it’s time to increase my low carb meals. My problem is snacking. I get really hungry between meals and I don’t like eating raw veggies – so snacking on veggie sticks is out – as long as I can help it. Think I’ll have to eat more yoghurt with my very berry sauce.

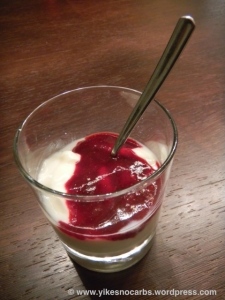
In my attempts to recreate something sweet but healthy, I stumbled on something which I really liked – eating a homemade berry sauce or coulis with soy yoghurt. Many years ago when I was first diagnosed as having diabetes, a doctor told me to just boil some fruit, puree it and use this as jam. I never did it because I felt making a small quantity would be too much trouble and a larger quantity would end up getting moldy in the fridge as I don’t eat jam everyday. Furthermore, jam is jellied fruit sauce and by just pureeing fruit, I would end up with a liquidy mixture.

I was making a layered dessert not too long ago which called for pureeing some raspberries and then adding sugar and gelatin. The first time I made the dessert, I followed the recipe but the sauce did not thicken. The next time around, I decided to omit the sugar and gelatin because I was too lazy. As I don’t like raspberries too much because of the seeds which get stuck between your teeth, I sieved the puree and was surprised at how nice it tasted. Basically what I made was a raspberry coulis without sugar and lemon juice – just like what the doctor told me to do many years ago!

Then I tried eating my sauce with different kinds of yoghurt – thick Greek yoghurt, plain yoghurt, 1.5% fat yoghurt and soy yoghurt. The Greek yoghurt and soy yoghurt tasted the best. I’ve tried to make my own soy yoghurt but that hasn’t succeeded (yet) so I’m now enjoying this with store-bought plain soy yoghurt. Divine! I sometimes eat a larger portion as a meal.

Berry season is coming around soon so get ready!

Raspberry coulis

Here’s how you can make your own pure berry sauce.

Pure Very Berry Sauce

Get a box of frozen berries or a punnet  of fresh berries – your choice. Frozen fruit is sold in 300 gr boxes here. I think frozen berries would work better. 300gr frozen berries yields about 200ml sauce. I’ve tried making my berry sauce with blueberries, strawberries, raspberries and mixed berries. All lovely!

For frozen fruit, empty the contents into a saucepan. Heat up the pan and then turn down immediately to very low. Let the fruit gently cook till soft. Stir once in a while at the beginning when the frozen fruit have not yet emitted enough liquid.

For fresh fruit, wash the fruit, cut into small pieces, if large, and put this in a saucepan with a little water – ¼ cup. Bring to a boil and quickly turn down the heat to very low. Let fruit simmer till soft. Do check it frequently to ensure that the fruit is cooking in liquid. If the fruit hasn’t emitted liquid yet, add a bit more water.

Once fruit is soft, press through a strainer. This is the hard part. You want to get as much fruit sauce as possible out of this. Every drop is precious. When you are fed-up of pressing, discard the pulp. The rest should be kept in an air-tight jar in the fridge. Use as soon as possible. You could even fill an ice-cube tray with sauce, freeze and defrost cubes when required.

Put a couple of teaspoons of sauce over your yoghurt and enjoy. Try to get a brand with  little sugar or no sugar added if possible. The berries are sweet and tart enough to balance out any bland-tasting yoghurt. Of course, you can be imaginative and decorate with fresh fruit and nuts. You can use this sauce for all kinds of desserts which call for berry sauces. Totally yummy, pure fruit!

Low Carb Pot Stickers a la Guo Tie, Mandu, Momo, Gyoza

12 Mar

Image

I tried making potstickers with success some time ago and haven’t made them ever since. I made the wrappers myself using my pasta machine to roll out the dough. The potstickers turned out beautifully. Unfortunately, my pasta machine has been sitting in the cupboard lately as I experiment with other dishes.

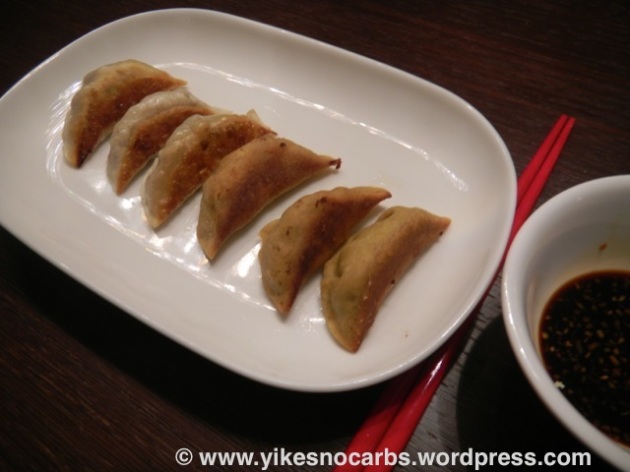
When a friend of mine recently showed me how easy it was to roll out the wrappers, I suddenly got a kick out of making my own potstickers from scratch. No need to unpack the machine and clean it up. After making a batch of ‘normal’ potstickers and ending up with a fair amount of filling left, I wondered if it was possible to use my low carb dough to make them. After all, I’ve made low carb raviolis and low carb Swabish maultaschen with great success. So it was time to see if low carb pot stickers were possible! And yes, it is possible! You can make them low carb! In the photo above, the 3 dumplings on the right are low carb, made with soy flour, and the three dumplings on the left are regular dumplings, made with plain flour. The regular dumplings have a slight chew in the dough wrapper which I was not able to replicate in the low carb ones. Nevertheless, they tasted great.

Before going on, let me divert and give you a short lesson about pot stickers as I myself was confused about the profusion of names. The name pot stickers is English, used to describe the dumplings pictured above when pan-fried. In China, these dumplings are actually called Jiao Zi. They can be cooked in different ways. When they are steamed, they are called zheng jiao. When they are boiled eg. for use in soups, they are called shui jiao. When pan fried, they are called guo tie – in English, pot stickers, although mine have never really gotten stuck to my pan!

These delicious morsels are not only eaten in China. They can be found in many Asian cuisines. The fillings are just different. In Japan, they are called gyoza. In Nepal, they are called momos. In Korea they are called mandu. All these dumplings are wrapped as I have done, although sometimes a different shape is used. These are not to be confused with Russians dumplings, pelmeni, which look similar. Pelmeni wrappers are made with egg. So are the turkish mantis.

I like my jiao zi pan-fried. I find they taste best, served with a dipping sauce. The dipping sauce is essential, so don’t omit it. I’ve tried my dumplings with a Chinese filling, a Japanese filling and a Korean filling containing kimchee. The Korean filling took the most effort – there were so many ingredients – but it won hands down in taste, so I’m going to give you the filling recipe below. If you are just starting out making dumplings or don’t have time, just look for something simpler. My friend made hers simply with ground beef and chopped chives, seasoned with soy sauce and sesame oil.

By the way, although I did roll out the wrappers for the regular dumplings the traditional way by hand, I would not recommend doing it with the low carb dough. It is quite tough to handle. A pasta machine is required.

So let’s get started!

The Wrappers

The recipe for my low carb pasta dough can be found here. Make the dough and let it stand in the fridge while you make the filling or make it the day before. Roll out the dough only when you are ready to make the dumplings.  My recipe will yield about 50+ pcs depending on how big your cutter is. The glass I used to cut the rounds measured 7cm in diameter. I would recommend a slightly bigger circle though.

Mandu Filling

200 gr ground beef marinated with 1 tsp soy sauce, 1 tsp oil, 1 ½ tsp sesame oil, 3 cloves minced garlic, salt and pepper

a small handful cellophane noodles, soaked in hot water till soft, then chopped finely

a handful of bean sprouts (about 1 cup), blanched and chopped finely

3 shiitake mushrooms, soaked for 20 min in hot water or till soft, drained and chopped finely. You can also use champignons, mu-erh mushrooms or enoki mushrooms

about 1 cup kimchee chopped finely

3 garlic cloves minced

1 small onion minced finely

about 4 stalks chinese chives or green onions, chopped finely

You don’t have to be so exact about the quantities. More veggies and less meat is also ok. You can even add some tofu, mashed. Just make sure all the ingredients are finely chopped, otherwise they will poke into the wrappers and rip them.

Mix the above ingredients together and season with:

½ Tbsp soy sauce

1 Tbsp sesame oil

1 egg white

½ Tbsp sesame seeds

salt, pepper

To check if your seasoning is ok, fry a small quantity and taste. If you don’t want to do this, it’s fine. It’s ok if your filling is underseasoned as you will be using a dipping sauce. So it’s better to underseason than overseason.

Assembly

Once the filling is done, roll out the dough. My pasta machine has 10 settings. I roll the pastry out to no. 6 or 7. It should be slightly thicker than won ton wrappers or ravioli wrappers – only slightly. You don’t want them too thin and fragile but also not so thick that you can’t pleat them. Cut out circles with a wide-mouthed glass. More than 7cm in diameter is good. If you are using a glass and not a cutter, you will need a sharp knife to help you. Lightly dust the circles with flour (you won’t be using that much) so that they don’t stick together. Collect all the leftover cuttings together, roll out again and cut more circles. Do this until you find that the dough will not hold together anymore and is difficult to handle.

Folding the dumplings

Fill and pleat the dumplings. Here is a quick tutorial. If your dough is not too dry, you can omit using the water. Just press the edges together firmly to seal.

Once you’ve made all the dumplings, set aside the amount that you wish to cook immediately and freeze the rest. To freeze, place a piece of plastic wrap on a tray or large plate. Place dumplings on the tray without touching. Put tray in the freezer for about an hour. Once hardened, transfer the dumplings into ziploc freezer bags and store in the freezer, hopefully for not too long.

3 low carb on left, 3 regular on right


Pan-frying the dumplings

You will need a large frying pan with a lid. A wok won’t work. Put a thin layer of oil in the frying pan to coat. When the oil is heated, place the dumplings into the pan, ensuring they don’t touch each other. Over medium heat, brown the bottoms. Do the same when cooking frozen dumplings. Once the bottoms are nice and browned, pour in ½ cup water and immediately cover the frying pan. Turn the heat down a little, but not too low. After about 5 minutes, check to see if the water has evaporated. Fresh dumplings should probably be cooked at this stage. Take off the cover, let the leftover water evaporate and that’s it. If using frozen dumplings, you will need to cook them longer. If there is no water left in the pan, add a little more, otherwise cover the pan again. Check after another 3 min. The dumplings should be done and the bottoms crisp. You can cut one to check doneness.

Dipping sauce

While the dumplings are steaming, prepare the dipping sauce. Many chinese jiao zi recipes call for a dipping sauce made up of a mixture of soy sauce and vinegar. You should use chinese vinegar. Since I didn’t have chinese vinegar, I found this sauce which I liked.

¼ cup soy sauce

⅛ cup sweet soy sauce

1 Tbsp chinese rice wine

1 Tbsp rice vinegar

½ Tbsp grated ginger

a sprinkling of chili flakes (optional)

Tip: if you have a large quantity of sauce leftover after your meal, use it to marinate sliced chicken overnight and then stir fry. Delicious!

Potstickers can be eaten as an appetizer or you can increase the serving size and have them as a main course.

chinese dumplings

Print this recipe – Low Carb Potstickers

Orange-scented Winter Vegetable Soup

10 Jan

What’s better than a warm nourishing soup to warm up your cold body from inside out? Soups somehow taste better in cold, winter weather.

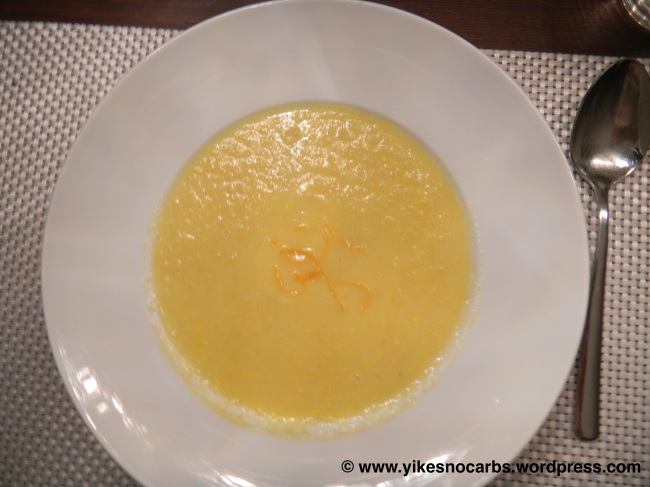
I didn’t make very many soups the whole summer long – not even in autumn – but now I’m starting to crave them. I had my first opportunity last week to cook soup when I ended up with a lot of root vegetables in the fridge after using parts of them for other purposes. This soup is a result of what I had but I think you could substitute other root vegetables equally well eg. use turnips or kohlrabi. The orange juice lent a citric note to an otherwise bland collection of root vegetables. The result – an elegant soup,  which you could enjoy with guests.

Orange-scented Winter Vegetable Soup (serves 4)

Image

1 medium onion

1 medium carrot

1 medium parsnip

stems of two broccolis (the trunks)

¼ of a small celery root

juice of half an orange

zest of a quarter orange

2 ½ cups vegetable or chicken broth

cream

salt, pepper

Chop the onions. Peel and cut the vegetables into slices or small pieces.

Sauté the onions in some olive oil till glazed. Put in the root vegetables and let cook for a few minutes. Add the broth ensuring that all the vegetables are covered with liquid. If not, add a bit more broth or water. Bring to a boil, cover and cook on low heat till the vegetables are tender, about 20 minutes.

Once done, puree the soup. Add the orange juice, season with salt and pepper to taste. If the soup is still too thick for your liking, thin with more orange juice, broth or water. Stir in the orange zest and add a dollop of cream. Stir and taste again.

Serve garnished with strips of orange peel or orange filets.

Print this recipe – Orange-scented Winter Vegetable Soup

Broccoli and Red Pepper Stir Fry with Ginger and Sesame

8 Jan

To accompany the dish I posted yesterday, I made a broccoli stir fry.

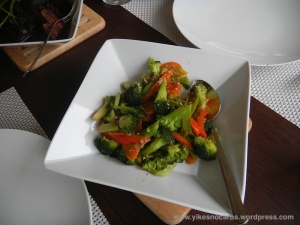
Broccoli and Red Pepper Stir Fry with Ginger and Sesame

Broccoli and Red Pepper Stir Fry with Ginger and Sesame

I loved the flavor the ginger and sesame lent to the vegetables. The original recipe can be found here. The only thing I did different was to add a few strips of red bell pepper to add some color.

Easy and lovely!

You could also expand this recipe by adding some sliced chicken, sliced beef or cubed tofu for a low carb main course.

Soy Sauce Chicken with Hard-boiled Eggs and Shiitake Mushrooms

7 Jan

We started 2014 with guests over on the first weekend and they requested a meal without carbohydrates! Well, that’s not a problem for me, is it?

I thought of surprising them with cauliflower rice (and were they surprised – they just couldn’t figure it out) and decided to serve something Chinese. Remembering a dish I used to have as a child – braised pork in soy sauce lightly scented with spices – I decided to give it a go with chicken since we don’t eat much pork anymore. Instead of looking through my cookbooks, I googled and found a recipe on About.com and then adjusted it. The dish turned out so good, I just have to share it and am proud to make it my first post of 2014! We ate the leftovers the next day and were really sorry that there wasn’t anymore for a third day! 🙂

Soy Sauce Chicken with Hard-boiled Eggs and Shiitake Mushrooms

Soy Sauce Chicken with Hard-boiled Eggs and Shiitake Mushrooms


Soy Sauce Chicken with Hard-boiled Eggs and Shiitake Mushrooms (serves 6)

1 whole chicken, about 1.2kg

6 hard-boiled eggs (you can put in as many eggs as you want, depending on how many you think each person will eat)

6 dried shiitake mushrooms

1 large onion, peeled and sliced

1 star anise

sunflower oil

Marinade

⅓ cup light soy sauce

⅓ cup water

3 Tbsp dark soy sauce

4 Tbsp erythritol

2 ½ Tbsp Chinese wine (substitute: Sherry)

2 green onions, cut into 3 inch lengths

2 cloves garlic crushed

Mix all the ingredients for the marinade together.

Cut the chicken into pieces, reserving the back for another use (e.g. making chicken broth). Make slits on the bigger pieces. I usually cut the chicken breast into 3 pieces. Put the chicken pieces into a glass bowl, cover with marinade and let stand overnight or for at least a couple of hours.

The next day, when ready to cook, soak the mushrooms in hot water for about 20-30 minutes till soft and slice. Remove the chicken from the refrigerator and let stand at room temperature during this time.

Heat some oil in a wok or large non-stick pan (with a cover). Remove the chicken pieces from the marinade and brown in the wok or frying pan on all sides. Take out the chicken and reserve on a plate. Sauté the onions in the same pan adding a bit more oil if necessary. Parallel to this, boil the marinade in a small saucepan for about 5 minutes. When the onions are lightly caramelized, put back the chicken and add the hot marinade and sliced shiitake mushrooms. Put in the star anise. The chicken and mushrooms should be almost covered with liquid. If there is too little, add more water and a bit more of the two soy sauces. Bring the chicken in the marinade to a boil, turn down the heat, cover and let simmer for about 30-45 minutes till the chicken is done. If you like your chicken very tender and almost off the bone, simmer it longer.

When the chicken is almost done, check the seasoning, adding salt/soy sauce or erythritol if necessary and put in the hard-boiled eggs. Turn the eggs after 1-2 minutes so that the other side will get brown too.

Garnish with green onion curls, serve with a vegetable stir-fry and lots of cauliflower rice to soak up that delicious sauce!

Print this recipe – Soy Sauce Chicken

Summary – October-December 2013

22 Dec

Time for another quick look at how I’ve been faring. I wanted to get this written before the end of the year.

In my last quarterly post, I mentioned that I would stop going on a full low-carb diet but only low carb occasionally. Well, it turned out to be very little low-carbing and when I got around to preparing for Christmas, that was the end of anything low-carb. 😦 This also explains the lack of any low-carb recipe posts.

So it is no wonder that my latest Hb1Ac went from 6.1 to 6.2. Everything else tested in my blood test (Cholesterol, Triglycerides, etc, etc) were within the norm. I gave my doctor a disappointed look and he said I was over-reacting and indulging in carbs in moderation is very much allowed!!  I think that is the key word – in moderation. 6.2 and 6.1 are already very good values, he added.

Since my Hb1Ac value increased, I’ll have to be more strict and see what happens next quarter. My goal was to get my Hb1Ac down to 6.0 – I’m almost there but not quite.

Looking back at my initial posts more than 3 years ago, I can now see that you can’t just listen to people and believe what you read. You need to try things for yourself and decide. It’s a good thing I did not get paranoid and aim for a 4.8 Hb1Ac which one author claimed was what he achieved on a low carb diet and which is the Hb1Ac of a ‘normal’ person. I think I would have probably died of hypoglycemia! 

Well, I’ll strive to be good for the next couple of months and let’s see what happens!

Till then I wish everyone who has read this post this far a very Merry Christmas and a Happy New Year!

Floral Swirls Tree for Christmas Vector Graphic

Saffron Fish Soup with Julienned Vegetables

17 Nov

I love eating soup on a cold evening – it’s so heart-warming. Having gotten sick of pureed soups, I looked through my soup recipe collection and pulled out one which featured fish pieces in a light broth. At the same time, I had a vision of a saffron-infused fish soup I had in a restaurant a few months ago. I wondered if I could transform my recipe into the restaurant soup without going through too much bother. So a little experimenting was about to begin and I must say, the result is a very easy soup which can be whipped up in minutes – voilà!

Image

I actually made this recipe twice. The first time I followed a recipe I found on the internet which claimed to be a saffron fish soup but which didn’t turn out, color-wise, how I wanted it to be. The recipe also used garlic which I felt, came on too strong although only one clove garlic was used. The next time around, I used ginger instead which turned out to be a much better choice. I didn’t salt the fish and I thought it was fine.

Saffron Fish Soup with Julienned Vegetables (serves 2)

300 gr firm white fish fillets or a mixture, cut into big pieces

1 carrot, julienned

60 gr leek, julienned

2 big mushrooms, sliced

1 shallot, sliced

1-2 slices ginger, julienned

½ medium tomato, seeds removed and diced

2 cups vegetable broth (if you have fish broth made from fish bones, all the better)

pinch saffron

cream

olive oil

Heat about 1 Tbsp olive oil in a frying pan and sauté the onions. When glazed, add the carrots and sauté a few minutes before adding the ginger, leeks and then the mushrooms. When done, set aside.

In a saucepan, bring the broth to a boil. If you are not averse to using broth granules, you can quickly make up some broth this way. Your broth should be tasty at this point as you won’t be adding any other seasoning after this. If it isn’t, season it with salt and pepper or broth granules. Then add a pinch of saffron to the broth. You won’t really see the yellow color yet.

Add the fish pieces and tomatoes and let cook on a low fire for a few minutes (not more than 5 min) till the fish is lightly done. Put in the cooked veggies and stir gently to mix. To bring out the yellow color, add some cream. You can add as much as you want. The cream serves to bring out the yellowness of the saffron and it’s really up to you. I put in about 1-2 Tbsp.

Light and lovely! If you have enough fish in your soup, you can do away with the crusty bread! 🙂

Print this recipe – Saffron Fish Soup with Julienned Vegetables